Environment Setup
Setting Up the Development Environment
💡 Key Terms Preview
- Sui CLI: Command-line tool for building, testing, and deploying Move packages.
- VS Code Extension: GUI-based tool for developing and executing Move and PTBs.
- Workspace: Project unit managed by the VS Code Extension.
- Explorer View: VS Code panel for creating and managing Move projects.
1. Install Sui CLI
macOS / Linux / WSL
brew install suiWindows
choco install suiVerify installation:
sui --version⚠️ The Sui CLI is required to build and run Move code. Install it first before continuing.
2. Install VS Code – Sui Extension
The Sui Extension lets you compile, deploy, and test Move smart contracts and visually build and execute PTBs inside VS Code.
Key Features
- Compile & Deploy Move packages
- Upgrade Support via
upgrade.toml - Object Explorer / Package Explorer
- Built-in PTB Builder (Drag & Drop)
Installation Steps
- Open VS Code → Extensions (⇧⌘X / Ctrl+Shift+X)
- Search for
Sui Extensionand install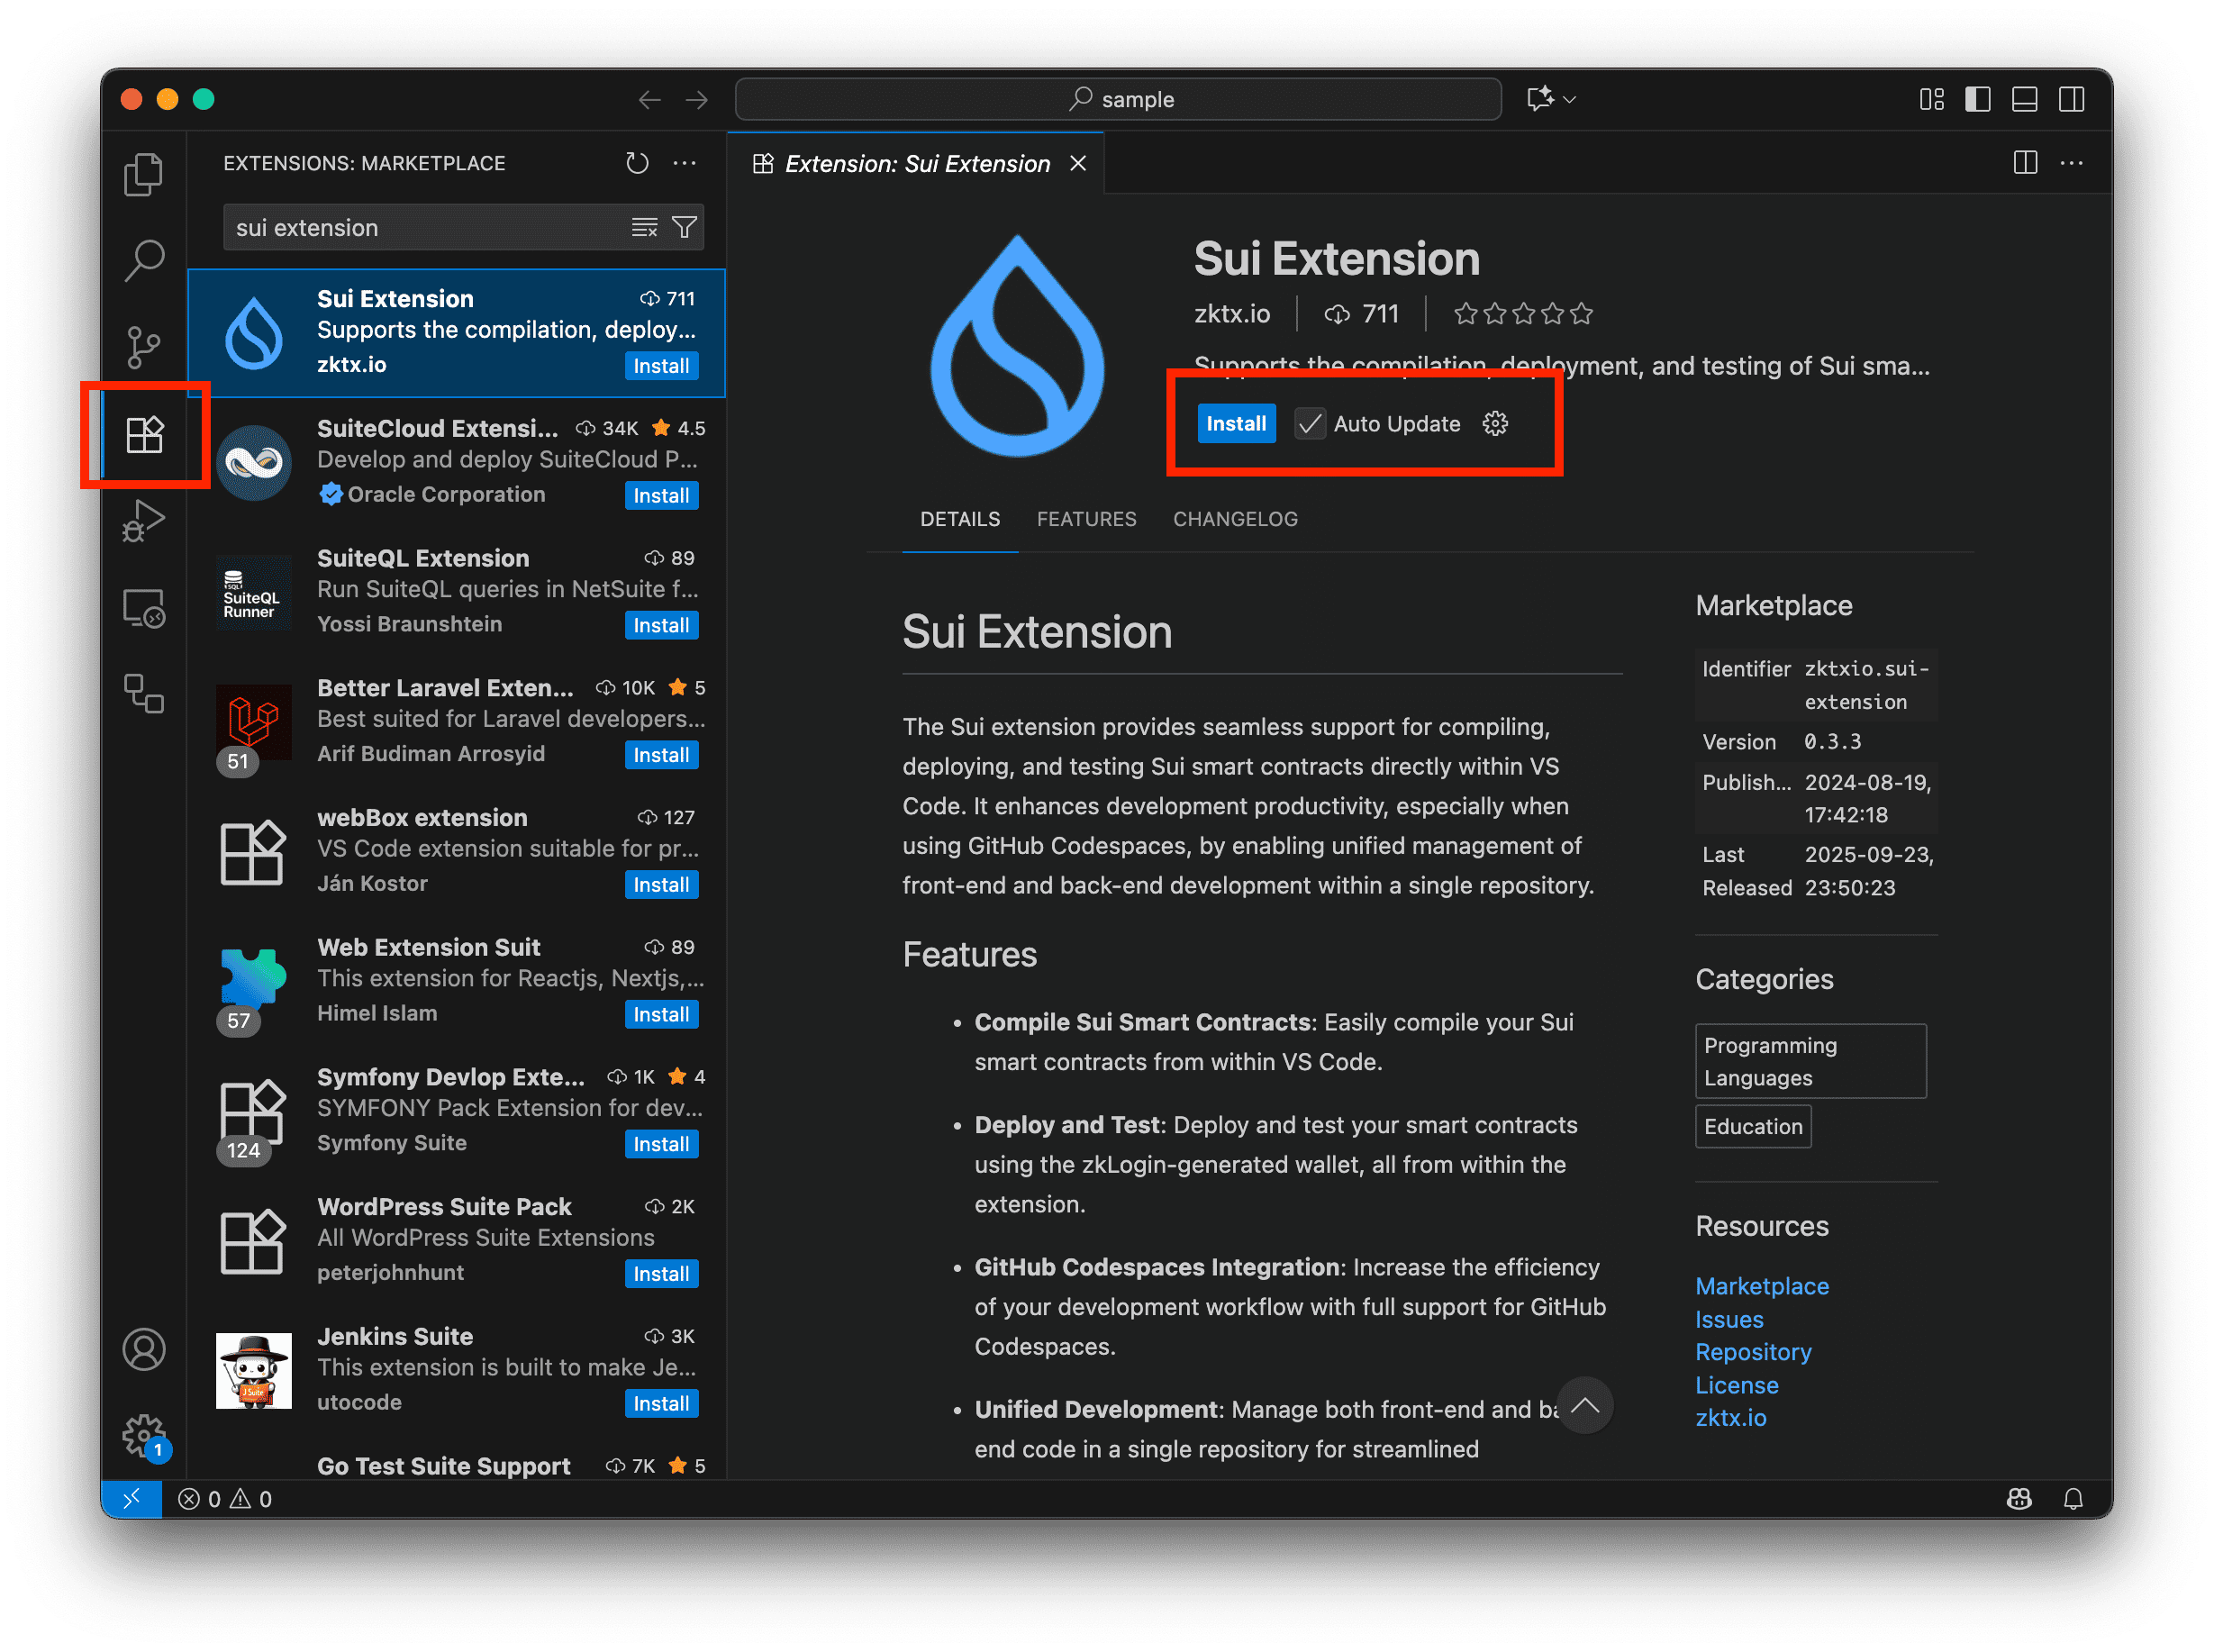
- Restart VS Code after installation
⚠️ Requirement: Sui CLI must be installed first.
3. Login — zkLogin
After selecting the network, you can log in to your wallet via Google Login (zkLogin).
💡 It uses PKCE (Proof Key for Code Exchange)
to securely relay the JWT from an external website.
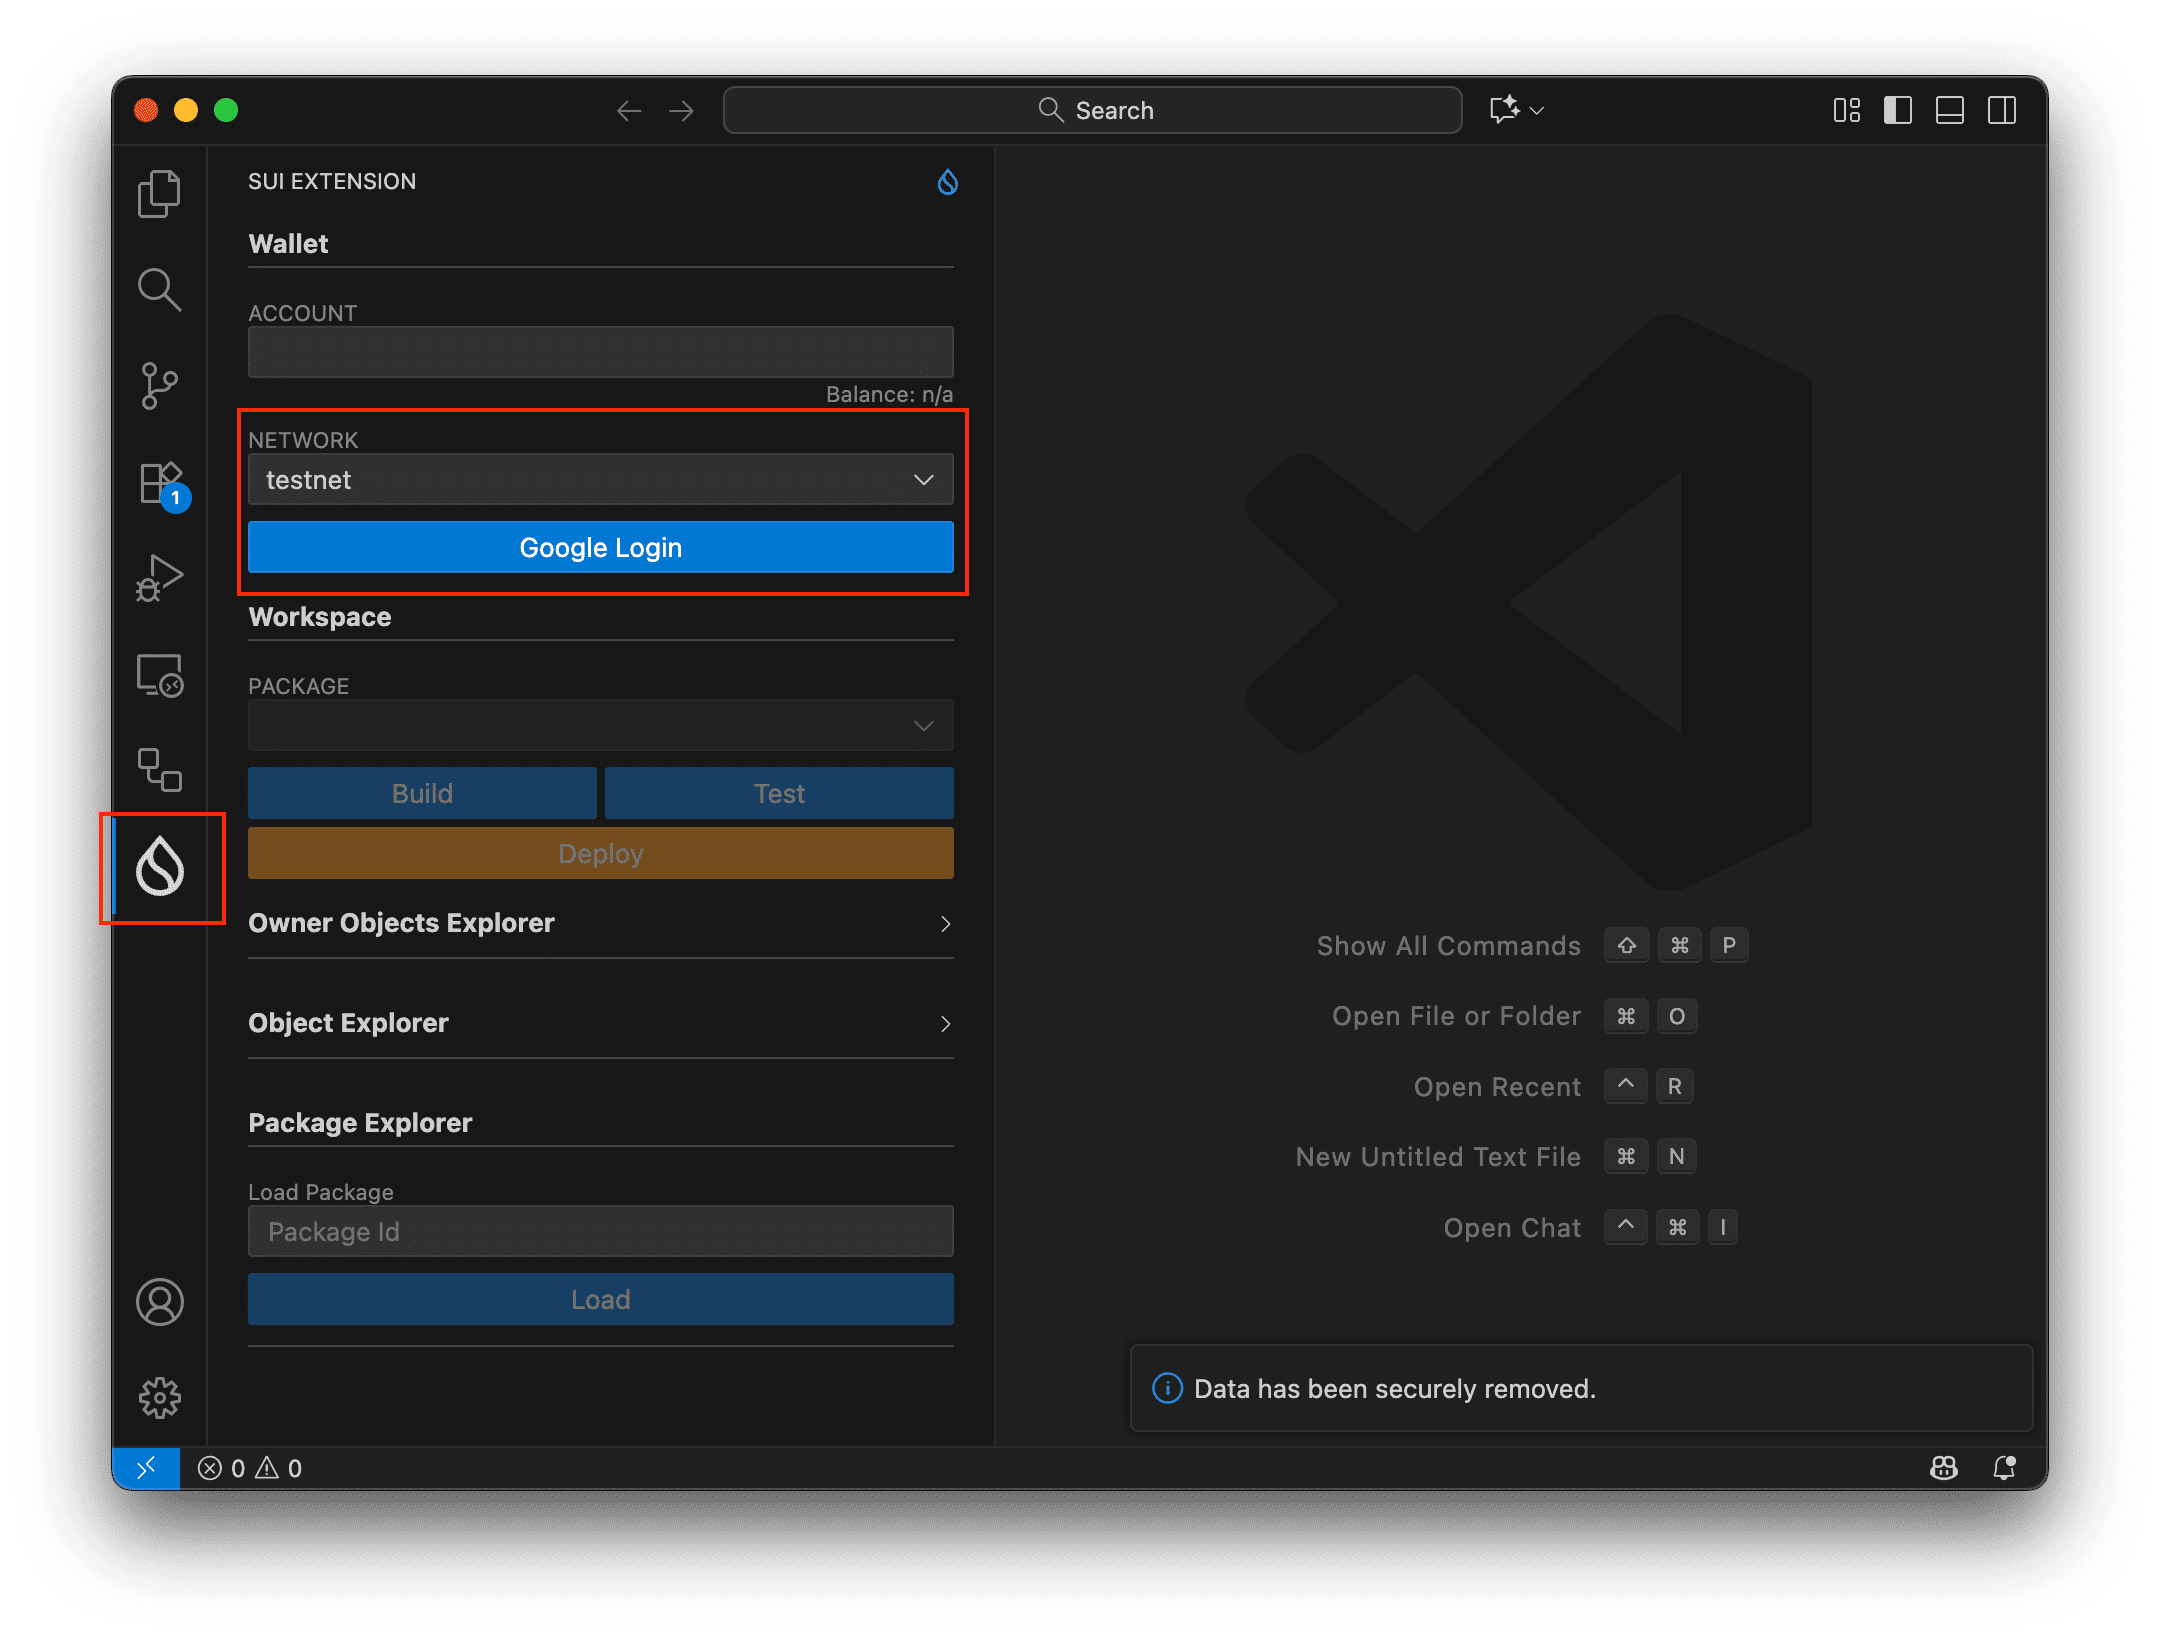
4. Sui Extension Interface
Click the Sui Extension icon in the left Activity Bar. The Primary Side Bar switches to the Sui Extension interface.
- Workspace: Create, build, test, and deploy Move projects
- Owned Objects Explorer: Inspect objects owned by a specific account
- Object Explorer: Query the state of a specific object
- Package Explorer: Load deployed packages, list entry functions by module, and execute them
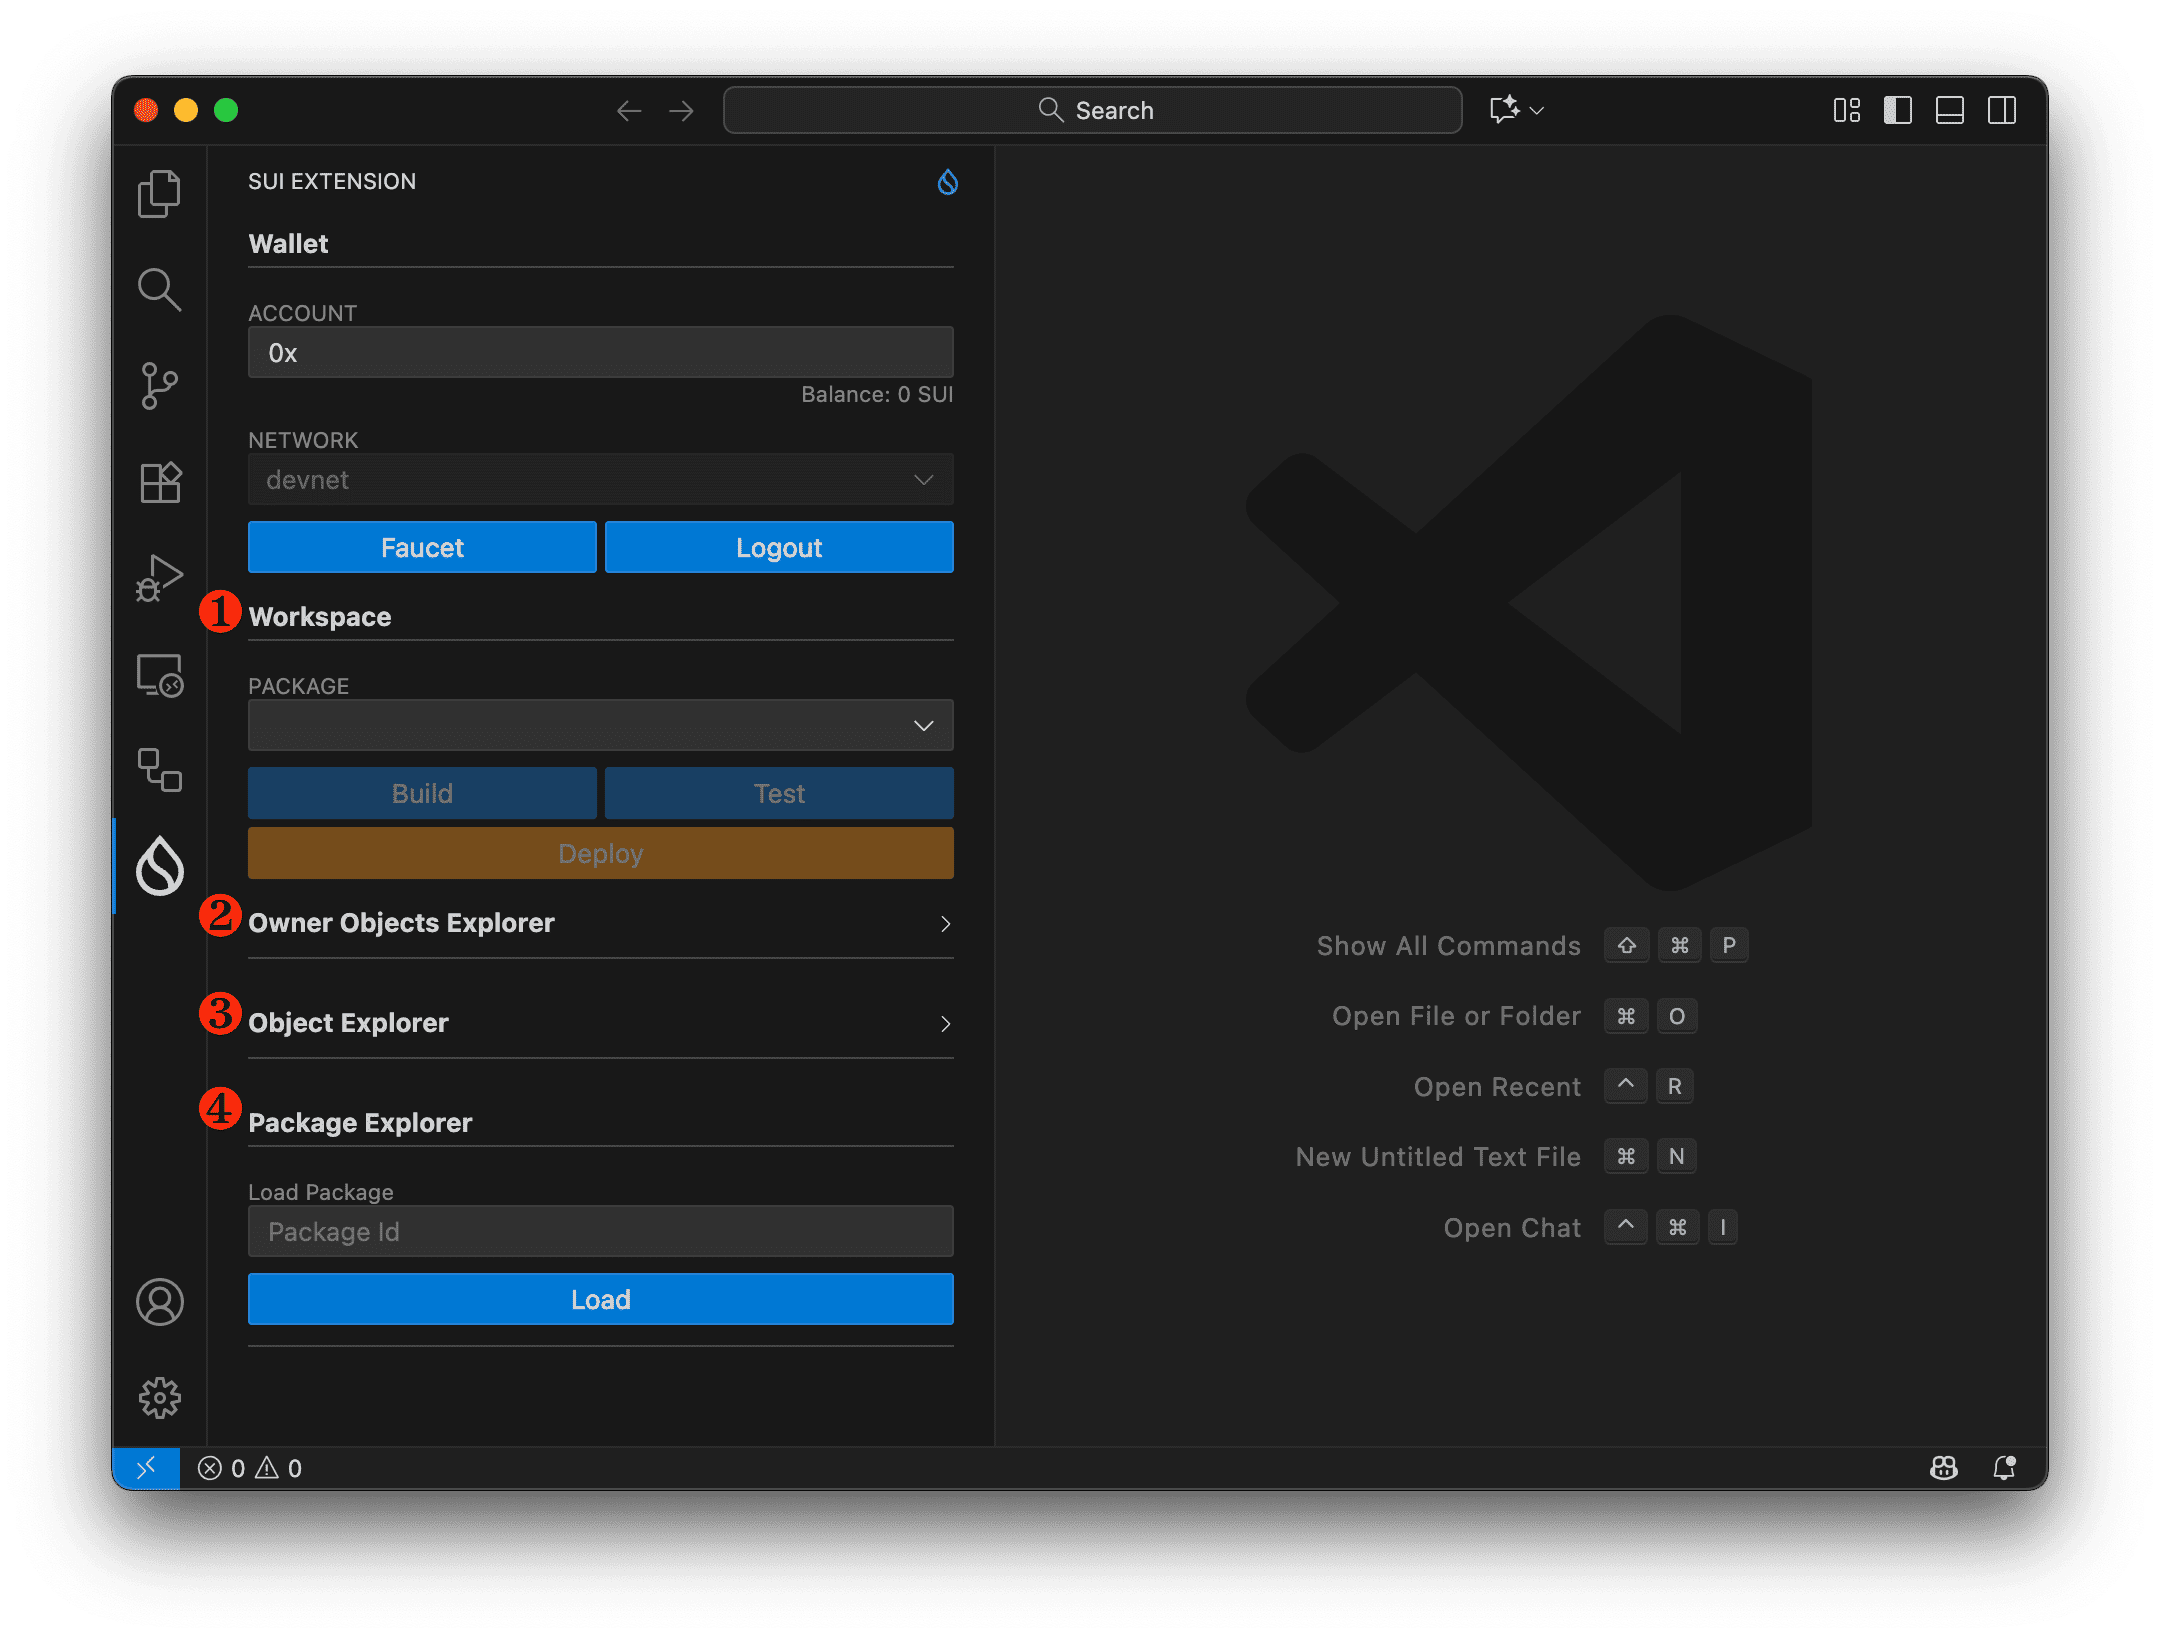
5. Workspace in the Sui Extension
Each Move project is managed as a Workspace, bundling your package, configuration, and build outputs.
| Component | Description |
|---|---|
Move.toml | Defines package name, dependencies, and addresses |
sources/ | Directory for .move source files |
build/ | Stores compiled artifacts |
💡 A single Workspace can contain multiple packages, and you can switch between them easily in the Extension.
💡 Next, you’ll build and test a Move project using both the Sui CLI and the Extension.